
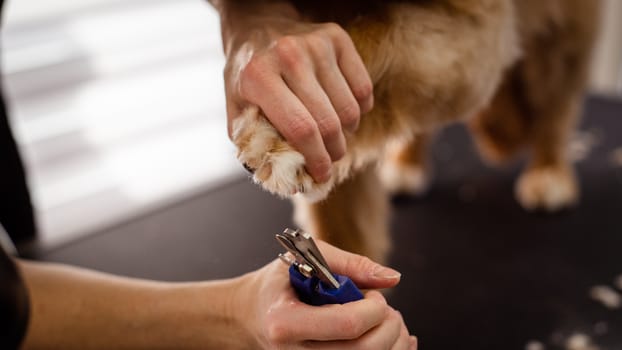
Many dog owners dread nail trims, fearing they might cut the quick and hurt their pup. However, with the right approach, you can safely trim your dog nails without cutting the quick and turn grooming into a stress-free routine. This step-by-step guide will walk you through every stage, from gathering the right tools to handling accidents calmly. By the end, you’ll have the confidence to keep those paws neat and healthy.
Gather the Right Tools for a Safe Trim
Before you begin, ensure you have all necessary equipment on hand. Using the correct tools minimizes the risk of cutting the quick and makes the process smoother for both you and your dog.
- Dog nail clippers (guillotine or scissor type) – choose sharp blades to avoid crushing the nail.
- A Dremel or nail file (optional) – for smoothing rough edges after trimming.
- Styptic powder or cornstarch – to stop bleeding if you accidentally cut the quick.
- Flashlight or bright lamp – especially helpful for dogs with dark nails.
- Treats – for positive reinforcement during and after the session.
- Towels or a non-slip mat – to keep your dog steady and comfortable.
Additionally, having a helper to hold your dog can be useful, especially for anxious or large breeds. Prepare everything before you start so you don’t have to scramble mid-trim.
1. Get Your Dog Comfortable and Calm
Start by creating a relaxed environment. Choose a quiet time when your dog is already calm, such as after a walk or play session. Sit on the floor with your dog in your lap or beside you on a non-slip surface. Gently handle each paw, pressing lightly on the toes to extend the nails. Reward calm behavior with treats and praise. If your dog shows anxiety, take breaks and only trim one or two nails per session. Building positive associations is crucial; never force the process. Furthermore, desensitize your dog to the sound of clippers by letting them sniff the tool and clicking it near them without cutting. This step alone can prevent future struggles.
2. Identify the Quick in Light-Colored Nails
For dogs with white or translucent nails, the quick is visible as a pinkish area inside the nail. Hold the paw up to a light or use a flashlight to see the blood vessel clearly. The quick extends from the base of the nail toward the tip. Your goal is to cut only the curved, clear part of the nail, staying at least 2–3 millimeters away from the pink area. If you are unsure, trim conservatively: remove a tiny sliver at a time. Remember, you can always cut more later, but you cannot undo a cut quick. When the nail is freshly trimmed, you may see a small dark dot in the center – this is the end of the quick, so stop cutting immediately.
3. Identify the Quick in Dark-Colored Nails
Dark nails pose a greater challenge because the quick is hidden. However, you can still locate it using a flashlight. Shine the light from underneath the nail; the quick will appear as a dark, opaque shadow compared to the lighter nail tip. Alternatively, look at the bottom of the nail – the quick usually ends where the nail starts to curve downward. For extra safety, trim only the very tip of the nail, about 1–2 millimeters at a time. After each cut, examine the cross-section: if you see a small white or gray ring with a dark center, you are close to the quick. Stop immediately. Many groomers recommend using a Dremel for dark nails because it allows gradual removal with less risk of cutting the quick. However, if you prefer clippers, proceed with extreme caution and always have styptic powder nearby.
4. Position the Nail Clippers Correctly
Hold the clippers perpendicular to the nail, not at an angle. For guillotine-style clippers, insert the nail through the hole and align the blade so it cuts from bottom to top. For scissor-type, place the blades around the nail and squeeze firmly. Always cut from the underside of the nail, where the quick is farthest from the edge. Avoid cutting too close to the paw pad; the quick extends into the nail bed, and cutting too high can cause pain and bleeding. If your dog has dewclaws (thumb-like nails on the inner leg), remember to trim those as well – they are often overlooked and can grow into the skin. Position each paw so that the nail points toward you, giving you a clear view of the cutting area. Take your time; a steady hand prevents accidents.
5. Trim a Small Amount at a Time
The golden rule of nail trimming is to remove only the hooked tip of the nail. For most dogs, this means cutting off the curved part that extends beyond the pad when the dog is standing. If your dog’s nails are very long, the quick will also be long, so you will need to trim little by little over several weeks to encourage the quick to recede. Each session, remove just 1–2 millimeters. After each cut, check the nail cross-section: a solid white or light center indicates you are still in the safe zone. If you see a dark spot or pinkish hue, stop. For dogs with thick nails, use a Dremel to file down gradually. This method reduces the chance of splitting. Additionally, reward your dog after each successful clip to maintain a positive experience. Consistency is key – weekly trims keep the quick short and make the process easier over time.
6. Use a Dremel or File to Smooth Edges
After clipping, nails often have sharp edges that can snag on carpets or scratch you. A Dremel with a sanding drum or a nail file quickly smooths these rough spots. Hold the Dremel at a low speed and touch it to the nail tip in short bursts. Avoid prolonged contact, which can generate heat and cause discomfort. File each nail in one direction to prevent fraying. If your dog is nervous about the noise, introduce the Dremel gradually: let them sniff it while it is off, then turn it on at a distance, rewarding calm behavior. Over time, most dogs accept the vibration. For small dogs or those with thin nails, a simple emery board works well. Final smoothing not only prevents injury but also gives a professional finish. Furthermore, filing helps you better see the nail cross-section, making it easier to gauge the quick’s location in future trims.
7. Apply Styptic Powder in Case of Accidents
Even experienced groomers sometimes nick the quick. If bleeding occurs, stay calm – your dog will pick up on your anxiety. Immediately dip the nail tip into styptic powder or apply a cotton ball with cornstarch. Hold gentle pressure for 30–60 seconds. The bleeding should stop quickly. Avoid using hydrogen peroxide, as it can damage tissue. After the bleeding stops, avoid trimming that nail for a few days. To prevent infection, keep the paw clean and dry. Most importantly, do not punish your dog or yourself. Accidents happen, and they often teach you where the quick lies. Use the experience to adjust your technique: next time, cut a little less. For dogs that have had a painful quick cut, the next session may be more challenging. Go slowly, use plenty of treats, and consider having a professional groomer demonstrate the correct angle. With practice, you will develop a feel for where the quick is, making future trims safer and faster.
Conclusion
Learning how to safely trim your dog nails without cutting the quick is a skill that any pet owner can master with patience and the right techniques. By gathering proper tools, identifying the quick, cutting small amounts, and handling accidents calmly, you protect your dog from pain and build trust. Remember, it is okay to seek help from a vet or professional groomer if you ever feel unsure. Regular trims – every 3–4 weeks – keep nails healthy and prevent issues like splayed feet or joint strain. With practice, you’ll both look forward to a quick, stress-free grooming session. Now grab your clippers, reward your pup, and enjoy those perfectly trimmed paws!