
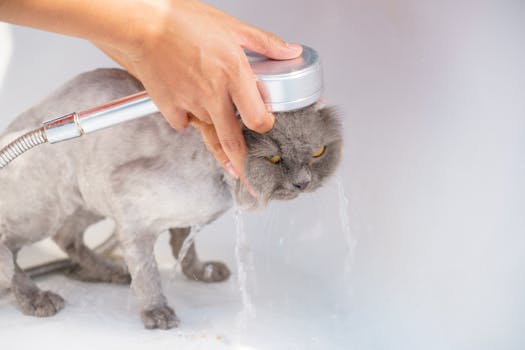
Bathing your dog at home can be a rewarding experience that strengthens your bond while keeping your pet clean and healthy. However, without the right approach, it can quickly turn into a soggy, stressful struggle. Learning how to bathe your dog at home properly is essential for maintaining a shiny coat and healthy skin. This step-by-step guide will walk you through everything you need to know, from gathering the right tools to drying your dog safely. Whether you’re a first-time owner or a seasoned pro, these expert tips will help you achieve a calm, effective bath time every time.
Materials and Tools You’ll Need
Before you begin, gather all necessary supplies. Having everything within arm’s reach prevents you from leaving your wet dog unattended, which can lead to accidents or anxiety. Here’s a checklist of essential items:
- Dog-specific shampoo and conditioner – Never use human products; they disrupt your dog’s pH balance.
- Brush or comb – A slicker brush or undercoat rake to remove loose fur and mats before bathing.
- Small plastic cup or handheld sprayer – For controlled rinsing.
- Non-slip bath mat – Provides traction and reduces slipping stress.
- Towels (2–3 large, absorbent towels) – Microfiber towels work best for quick drying.
- Cotton balls – To gently plug your dog’s ears and prevent water from entering the ear canal.
- Eye lubricant (optional) – Protects eyes from shampoo irritation.
- Treats or peanut butter – Positive reinforcement keeps your dog calm and cooperative.
Additionally, choose a location that is warm, draft-free, and easy to clean. Many owners prefer a bathtub, shower stall, or even a utility sink for small breeds. A handheld sprayer attached to the shower head makes rinsing much easier.
Step 1: Brush Your Dog Thoroughly
Brushing before the bath is a critical step that many owners skip. It removes loose fur, dirt, and tangles that would otherwise become impossible to manage when wet. For double-coated breeds like Golden Retrievers or Huskies, a thorough brushing with an undercoat rake helps reduce shedding and prevents mats from trapping water against the skin. Start at the head and work your way down to the tail, using gentle strokes in the direction of hair growth. Pay special attention to the armpits, belly, and behind the ears, where matting commonly occurs. If you encounter a tangle, use a detangling spray or your fingers to gently separate the hair instead of yanking with a brush, which can cause pain and fear. This step not only makes the bath more effective but also reduces the amount of hair that ends up in your drain. As a result, you’ll spend less time cleaning up afterward.
Step 2: Prepare the Bathing Area and Water Temperature
Set up your bathing station by placing the non-slip mat on the bottom of the tub or sink. Fill the area with a few inches of lukewarm water — about 98–100°F (37–38°C) is ideal. Dogs have sensitive skin, and water that is too hot can burn them, while cold water causes discomfort and shivering. Therefore, test the water with your elbow or a thermometer before bringing your dog in. Next, place cotton balls gently into your dog’s ear openings — do not push them in too deep, just enough to form a loose plug. If you’re using eye lubricant, apply a drop to each eye to protect against accidental shampoo splashes. Finally, prepare a small cup or sprayer and have your shampoo bottle ready. For anxious dogs, smear a little peanut butter on the side of the tub to keep them licking and occupied. This simple distraction can significantly reduce struggle and make the entire process smoother.
Step 3: Wet Your Dog Evenly
Position your dog in the tub and give them a moment to adjust to the water. Using your cup or sprayer, start wetting your dog from the back of the neck and move downward toward the tail. Avoid spraying the face directly, as that can cause panic and coughing. Instead, use a damp washcloth to gently wet the head and muzzle. Ensure that the water penetrates down to the skin, especially in thick-coated areas like the chest and hindquarters. For double-coated breeds, you may need to part the fur with your fingers to get the water all the way through. Be patient — rushing this step leaves dry patches that make shampooing uneven and difficult to rinse. If your dog tries to jump out, speak in a calm, reassuring voice and reward calm behavior with treats. Furthermore, you can use a warm, wet towel to cover the dog’s back for a few seconds if they seem shivery; the added warmth often soothes nervous pets.
Step 4: Apply Shampoo and Lather Gently
Squeeze a small amount of dog-specific shampoo into your hands (follow the product’s dilution instructions). Starting at the neck, work the shampoo into a lather using your fingertips in circular motions. Move down the back, chest, sides, legs, and finally the tail. Do not scrub vigorously — gentle massage stimulates circulation and avoids irritating the skin. For dogs with skin allergies, use a hypoallergenic or medicated shampoo as recommended by your vet. Pay extra attention to dirty spots like paws (between the pads) and the rear area. Avoid the eye area and the inside of the ears. If your dog has a very thick coat, lift sections to ensure the lather reaches the skin. Let the shampoo sit for the time recommended on the bottle — typically 3 to 5 minutes for medicated products. However, for a simple cleaning, a minute or two is sufficient. During this time, continue to offer treats and praise to keep your dog relaxed. Never use human shampoo, dish soap, or harsh detergents, as they strip natural oils and can lead to dry, itchy skin and dandruff.
Step 5: Rinse Thoroughly and Completely
Rinse your dog with fresh lukewarm water, starting again at the neck and working downward. This is arguably the most important step because leftover shampoo residue can cause skin irritation, excessive scratching, and even hot spots. Use your fingers to part the fur as you rinse, ensuring water flows through every layer. Continue rinsing until the water runs clear and no suds remain. For heavily coated dogs, this may take 5 to 10 minutes. To test for residue, squeeze a handful of fur — if it feels slippery or soapy, rinse again. After the first rinse, you may apply a dog conditioner (especially for long-haired breeds) following the same process. Conditioner adds moisture, detangles, and leaves the coat soft. Let it sit for 1–2 minutes, then rinse again thoroughly. Remember to remove the cotton balls from the ears once bathing is complete, and gently wipe the inside of the ears with a dry cotton ball or soft cloth to remove any moisture.
Step 6: Dry Your Dog Properly
Drying is the final and often most time-consuming step. Start by lifting your dog out of the tub and immediately wrapping them in an absorbent towel. Gently press the towel against the coat rather than rubbing vigorously, which can tangle fur and cause friction against wet skin. If your dog tolerates it, use a second towel to squeeze excess water from the legs and tail. For most breeds, air drying is acceptable, but it can take hours and may lead to dampness-related skin issues if the undercoat stays wet. Therefore, many owners choose to use a blow dryer on a low, warm setting. Hold the dryer at least 12 inches away from the skin, and keep it moving constantly to avoid concentrated heat. High-velocity pet dryers are excellent for double-coated breeds as they quickly blast water from the undercoat. However, introduce the noise gradually — let your dog hear the sound from a distance first, and reward with treats. Never use a human hair dryer on a high setting, as it can burn your dog’s sensitive skin. Continue drying until your dog is completely dry to the touch, especially in hard-to-reach areas like the armpits, groin, and between the toes. Finally, give your dog a treat and some playtime to end the experience on a positive note.
Conclusion
Bathing your dog at home doesn’t have to be a battle. By following this step-by-step guide, you can ensure a safe, effective, and even enjoyable grooming session for both you and your pet. The keys are preparation, patience, and using the right products. Stick to a regular bath schedule — typically every 4–6 weeks for most dogs, but adjust based on breed, activity level, and skin condition. Over-bathing can strip natural oils, while under-bathing leads to dirt buildup and odor. With practice, you’ll become more efficient and your dog will learn to trust the routine. Remember that every dog is unique; some may never love bath time, but with gentle handling and lots of positive reinforcement, you can turn a necessary chore into a bonding moment. Now you’re ready to give your furry friend a professional-quality bath right at home.