
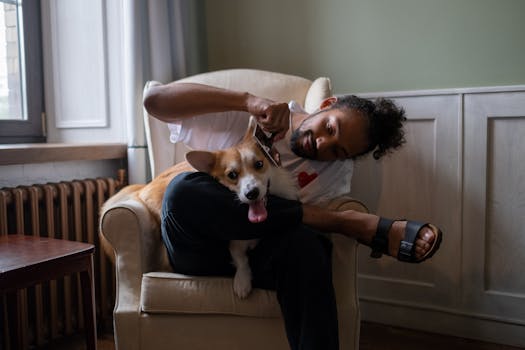
Grooming your dog's tail and rear area safely is an essential part of pet care that many owners overlook. When you learn how to groom your dog tail and rear area properly, you not only keep your pup looking neat but also prevent painful mats, skin infections, and hygiene issues. Whether you have a fluffy Goldendoodle or a short-haired Beagle, mastering this skill ensures your dog stays comfortable and healthy. In this step-by-step guide, we'll walk you through the entire process — from gathering the right tools to rewarding your dog at the finish line.
Step 1: Gather Your Essential Tools and Supplies
Before you begin, having the correct equipment on hand makes all the difference. Without proper tools, you risk pulling your dog's hair or causing discomfort. Furthermore, using the wrong comb can lead to broken coat or skin irritation. Gather the following items:
- Stainless steel slicker brush and a wide-toothed comb
- Grooming scissors with rounded tips (safety scissors)
- Electric clippers with a #10 or #15 blade (optional for thick coats)
- Dog-safe detangling spray or conditioner
- Pet wipes or gentle cleansing wipes (alcohol-free)
- Dog-safe shampoo and a small spray bottle of warm water
- Cornstarch or pet-safe powder for moisture control
- High-value treats to keep your dog cooperative
Additionally, you'll need a well-lit, non-slip surface such as a grooming table or a mat on the floor. Ensure all sharp tools are out of reach until you are ready to use them. A grooming loop or helper (if your dog is wiggly) can also be wise. Taking a few minutes to set up your workspace reduces stress for both you and your dog.
Step 2: Prepare Your Dog for Rear Grooming
Preparation is the foundation of a positive grooming experience. Start by exercising your dog beforehand — a short walk or play session helps release excess energy, making them more relaxed. Then, place your dog in a comfortable standing or lying position. Speak in a calm, reassuring tone and offer a treat to build a positive association.
Check your dog's overall demeanor: if they show signs of anxiety (tucked tail, whale eye, stiff body), pause and use counter-conditioning techniques. For instance, you can pair the sight of the brush with treats until they relax. However, never force a dog that is extremely stressed; instead, consult a professional groomer.
Next, perform a quick visual inspection of the tail and rear. Look for any redness, swelling, lumps, or debris. Pay special attention to the area around the anus — if you see dried fecal material or excessive licking, that may indicate anal gland issues. If you notice any abnormalities, contact your veterinarian before proceeding. A healthy tail and rear are clean, free of mats, and the skin is pink without irritation.
Step 3: Brush and Detangle the Tail and Rear Feathering
Now begins the actual grooming. Using your slicker brush, start at the tip of the tail and work upward in small sections. This method prevents pulling on the base of the hair. Hold the tail firmly but gently with one hand while brushing with the other. If you encounter a mat, do not yank it — instead, apply a detangling spray and use your fingers to tease the mat apart, then follow with the comb.
For dogs with long fur on the rear (such as Poodles, Shih Tzus, or Golden Retrievers), pay extra attention to the area behind the thighs and under the tail. These spots are prone to matting from friction and moisture. Use the wide-toothed comb to check for hidden tangles. Additionally, if your dog has a 'pant area' (the perineum), gentle brushing here helps reduce the chance of fecal matter sticking to the coat.
Remember to reward your dog frequently during this step. Each time you clear a section without resistance, offer a treat and praise. This builds trust and makes future sessions easier.
Step 4: Trim the Fur Around the Anus and Tail Base
This step requires caution because the skin around the anus is delicate. Only use scissors with rounded tips, and never point them toward the skin. If you are inexperienced with scissors, consider using clippers with a #10 blade (which is short enough not to catch skin).
Start by lifting the tail gently to expose the anal area. Using a comb, lift the hair away from the skin. Then, carefully trim the hair in a straight line, parallel to the body. Do not attempt to cut directly into the anus — your goal is to remove only the drooping or soiled hair that hangs outside the opening. For long-haired breeds, you might trim a 'sanitary strip' about an inch wide on either side of the anus. However, avoid shaving too close, as the skin here can be loose and easily nicked.
If your dog has a thick tail coat, trim the hair on the underside of the tail (the access point to the anus) to about half an inch in length. Use short, gentle snips. Take breaks and check your progress frequently. A good rule: never trim more than you can see clearly. Work in good light and keep your dog calm with treats.
Step 5: Clean the Rear Area Thoroughly
After trimming, it's time to clean. Use a damp cloth or pet-safe wipe to gently wipe the area around the anus, working from front to back to avoid spreading bacteria. For stubborn debris, apply a small amount of dog shampoo diluted with water and rinse thoroughly. Never use human wipes or soap, as they can disrupt the pH balance of your dog's skin.
Additionally, if your dog has a history of anal gland issues, you may need to express the glands during grooming. However, this is a delicate procedure best left to professionals unless your veterinarian has shown you how to do it safely. Improper expression can cause pain or infection. Instead, focus on keeping the area clean and dry. After wiping, pat the area dry with a soft towel. Dampness creates a breeding ground for bacteria and yeast. For extra protection, dust a small amount of cornstarch or pet-safe powder around the anus (avoiding the opening) to absorb moisture.
Finally, inspect the tail itself. Clean any dirt or debris from the tail hair and skin. For dogs with tail pockets (such as Bulldogs or Pugs), clean the fold with a damp cloth and dry thoroughly. Neglecting tail folds can lead to painful skin-fold pyoderma.
Step 6: Final Check and Rewarding Good Behavior
You're almost done! Step back and examine your work from all angles. Run your fingers through the tail fur to feel for any missed tangles. Check that the trimmed area is symmetrical (if you care about aesthetics). More importantly, look for any new redness, bleeding, or signs of discomfort. If you accidentally nicked the skin, apply styptic powder or cornstarch to stop bleeding and monitor for infection.
Now, give your dog a big reward! A high-value treat, a favorite toy, or a walk immediately after grooming reinforces that this activity ends positively. Additionally, you can incorporate a routine: grooming every 2–4 weeks (depending on breed) keeps the tail and rear manageable. Use a grooming journal or note on your phone to track progress and any areas that need extra attention.
If your dog seems stressed despite your best efforts, consider breaking the session into two parts. For instance, do brushing one day and trimming the next. Patience and consistency are key. Professional groomers also offer sanitary trims for those who prefer expert handling.
Conclusion
Learning how to groom your dog tail and rear area safely doesn't have to be intimidating. With the right tools, a calm approach, and a step-by-step method, you can keep your dog clean, comfortable, and mat-free. Remember, every dog is different — adjust your technique based on your pet's coat type, temperament, and health. Regular grooming not only improves hygiene but also strengthens the bond between you and your furry friend. Start with short sessions, use plenty of positive reinforcement, and always prioritize safety over speed. Your dog will thank you with a happy wag!