
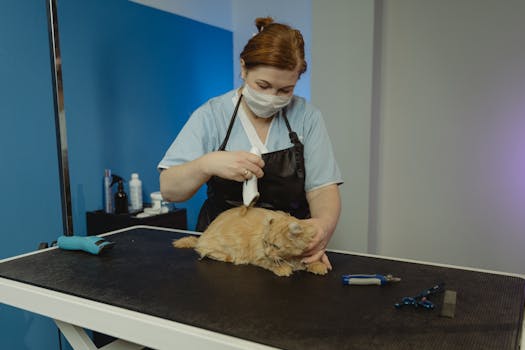
Grooming your dog is essential for their health and happiness, but it’s no secret that the face and muzzle are the most sensitive areas. Many dog owners find themselves anxious when they need to groom around your dog's face and muzzle because a sudden move can startle their pup. However, with the right approach, patience, and the proper tools, you can safely keep your dog’s facial hair neat, eyes clear, and muzzle comfortable. This step-by-step guide will walk you through every stage of the process, from preparation to finishing touches, ensuring a stress-free experience for both you and your furry friend.
Materials and Tools You’ll Need
Before you begin, gather all the necessary equipment. Having everything within reach minimizes interruptions and keeps your dog calm. Here’s what you need:
- Dog-safe grooming shears with rounded tips (blunt or curved scissors)
- Fine-toothed comb or slicker brush
- Grooming clippers with a quiet motor and a #10 or #30 blade (optional but useful for heavy coats)
- Dog-safe tear stain remover wipes or a damp washcloth
- Treats and a lick mat with peanut butter or yogurt
- Towels or a non-slip grooming table/mat
- Styptic powder or cornstarch (for accidental nicks)
- Calming spray or a quiet room to reduce anxiety
Additionally, ensure your tools are clean and sharp. Dull blades can pull hair and cause discomfort. If your dog is nervous, consider using a calming pheromone spray or playing soft music. Preparation truly sets the stage for success.
Step 1: Prepare Your Dog and Choose the Right Environment
Start by selecting a quiet, well-lit area where you and your dog can work without distractions. A non-slip surface, such as a rubber mat on a table or the floor, helps your dog feel secure. Begin with a short walk or play session to burn off excess energy—this reduces wiggling. Then, gently handle your dog’s face and muzzle for a few minutes, praising and treating them. This builds trust and gets them accustomed to touch. Furthermore, avoid grooming immediately after a meal or when your dog is overtired. A calm, relaxed dog is much easier to work with. If your dog shows signs of stress (lip licking, yawning, turning away), take a break and try again later. Remember, patience is key.
Step 2: Brush and Clean the Face Thoroughly
Before any cutting, brush the hair around the face and muzzle to remove tangles and debris. Use a fine-toothed comb or a soft slicker brush, working in the direction of hair growth. For long-haired breeds, pay special attention to the beard and eye area. Tangles can pull skin and cause pain if you try to cut through them. Next, clean the face with a damp cloth or a tear stain wipe. Remove any dried tears, food, or dirt from the corners of the eyes and the muzzle folds. This step is crucial because clean hair is easier to see and cut, and it prevents infections. Additionally, check for any redness, cuts, or irritation—if you notice sores, postpone grooming and consult your vet. Once the face is dry and tangle-free, you’re ready to move on.
Step 3: Trim Around the Eyes
Use Rounded Scissors for Safety
The area around the eyes demands extreme care. Use grooming shears with rounded tips—never pointy scissors. Place your hand on your dog’s head to steady it, then gently lift the hair away from the eye with your fingers. Trim only the hairs that fall into the eye or obstruct vision. Cut parallel to the eye, never toward it. For very small trims, you can use a safety comb attachment on clippers. If your dog flinches, stop immediately and reward them. Proceed only when they are calm. A good rule of thumb: “less is more.” You can always trim more later, but you can’t undo a cut. Furthermore, never use a vacuum or blower directly on the eyes.
Step 4: Shape and Trim the Muzzle and Beard
Working with the Muzzle Area
The muzzle is often the most ticklish spot. Start by combing the hair forward toward the nose. Using your fingers as a guide, trim the hair that extends beyond the nose’s outline. For a neat look, follow the natural curve of the muzzle. If your dog has a beard (like a Schnauzer or Terrier), decide on a length. Hold the beard with one hand and trim with the other, cutting vertically to avoid blunt lines. Always maintain a level head and avoid sudden jerks. To prevent whisker discomfort—yes, whiskers are sensory tools—only trim them if they become excessively long or unkempt, and never cut them flush to the skin. The same caution applies to eyebrow hairs (vibrissae). Hair around the mouth should be kept short to avoid trapping food and moisture, which can cause dermatitis. Use small, careful snips.
Step 5: Address the Cheeks and Jawline
After the muzzle, move to the cheeks and jawline. This area often collects matting behind the jaw and under the chin. Use a comb to lift the hair, and use clippers or scissors to blend the cheek hair into the muzzle. For dogs with heavy coats, clippers with a guard comb (e.g., #9 or #7F) can quickly even out the length. However, be cautious around the throat—the skin is loose and delicate. Always pull the skin taut with your free hand and cut away from the body. A common mistake is leaving a “ledge” where the cheek hair meets the shorter muzzle hair; instead, feather the cut so it looks natural. Additionally, check both sides for symmetry. If your dog is patient, you can use thinning shears to soften the line for a professional finish.
Step 6: Finish with a Calming Reward and Safety Check
Once you’ve completed the trimming, inspect your work by looking at your dog from all angles. Look for any stray hairs near the eyes, inside the nose, or around the lips. If you accidentally cause a small nick, apply styptic powder or cornstarch with a cotton swab to stop bleeding. Praise your dog lavishly and offer a high-value treat or a frozen lick mat. This positive association encourages cooperation for future sessions. Furthermore, clean your tools thoroughly and store them safely. After grooming, wipe your dog’s face again to remove loose hair. If the weather is cold, consider applying a dog-safe moisturizer to the nose and lips. Regular grooming every 2–4 weeks will keep your dog comfortable and reduce the need for major trims.
Conclusion
Learning how to groom around your dog’s face and muzzle is a skill that builds confidence and strengthens your bond. By taking it slow, using the right tools, and rewarding calm behavior, you can maintain a tidy, healthy face without stress. Remember that each dog is different—some may need more breaks or shorter sessions. If you ever feel unsure, consult a professional groomer for a demo or tips. With practice, you’ll become adept at this delicate grooming task, keeping your best friend looking sharp and feeling great.