
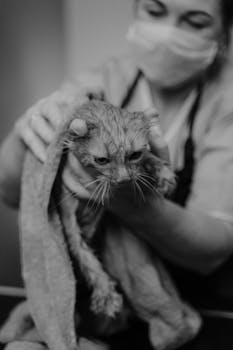
After a relaxing bath, your dog's coat is clean and fresh, but the real challenge begins when you reach for the towel. Improper drying can lead to skin infections, matting, and a stressed pup. Learning how to properly dry your dog after a bath is essential for their health and your sanity. In this step-by-step guide, we'll walk you through every stage to ensure a safe, effective, and comfortable drying process. Whether you're a new pet parent or a seasoned groomer, these techniques will help you avoid common pitfalls and leave your furry friend looking—and feeling—their best.
Materials and Tools You'll Need
Before you start drying, gather the right supplies to make the process efficient and gentle on your dog's skin. Here's what you should have on hand:
- High-absorbency microfiber towels (2–3) – They soak up water faster than regular cotton and reduce rubbing.
- Pet-safe blow dryer – Ideally with variable heat and speed settings; human hair dryers are often too hot.
- Slicker brush or wide-tooth comb – Essential for preventing mats, especially in long-haired or double-coated breeds.
- Cotton balls or pads – For gently drying inside the ears (never insert into the ear canal).
- Treats and a calm environment – Positive reinforcement makes drying a pleasant experience.
Having these items ready before you begin will prevent frantic searches mid-process and help your dog stay relaxed. Additionally, consider placing a non-slip mat on the floor to give your pet stable footing during drying.
Step 1: Towel Dry Thoroughly
Once you've finished the bath, lift your dog out of the tub and let excess water drip off. Place them on a towel and immediately start patting—not rubbing—their coat. Rubbing can tangle fur and irritate sensitive skin. Instead, use a pressing and blotting motion to absorb moisture. Start with the head and work your way down the body, using a fresh towel when the first one becomes saturated.
Focus on areas that hold the most water: the chest, belly, underarms, tail, and legs. For dogs with thick undercoats (like Huskies or Retrievers), gently squeeze clumps of fur to release trapped water. If your dog is comfortable, you can wrap them in a towel and let them sit for a few minutes before proceeding. Remember, the goal is to remove as much surface moisture as possible before introducing heat. Here are a few towel-drying tips to keep in mind:
- Use microfiber towels – they absorb up to eight times their weight in water.
- Work in sections – drying one area at a time prevents rubbing.
- Avoid vigorous twisting or wringing of the coat.
By taking your time with towel drying, you reduce the risk of fungal or bacterial growth that can occur when moisture lingers deep in the coat. This step also shortens the blow-drying phase, which many dogs find stressful.
Step 2: Use a Blow Dryer on Low Heat
After you've towel-dried as much as possible, it's time to bring in the blow dryer. However, caution is key: dogs have sensitive skin that burns more easily than ours, and the noise of a dryer can be frightening. Therefore, choose a pet-specific dryer with adjustable temperature and velocity settings. Set it to the lowest heat and a low or medium fan speed initially.
Hold the nozzle at least 6–12 inches away from your dog's skin and keep it moving constantly to avoid concentrating heat on one spot. Start with the back or shoulders—areas less sensitive than the belly or face. Use your free hand to fluff the fur as you dry, directing the airflow along the grain of the hair. For dogs who are nervous, introduce the sound of the dryer before turning it on full blast. Let them sniff the nozzle while it's off, then turn it on low and point it away from them. Reward calm behavior with treats.
Pay special attention to the undercoat: double-coated breeds need thorough drying to prevent odor and mats. If your dog has long hair, consider using a nozzle attachment to concentrate airflow. Never use a high-heat setting, as this can cause burns or discomfort. Furthermore, avoid blowing air directly into the ears, eyes, or nose. If your dog shows signs of stress—panting heavily, trying to escape, or trembling—take a break and use only towels to finish. Patience during this step is crucial for building a positive association with grooming.
Step 3: Brush While Drying
As the coat becomes about 70–80% dry, introduce a slicker brush or a wide-tooth comb. Brushing while drying helps separate hair strands, prevents tangles, and speeds up the process by allowing air to reach the skin. Work in small sections, starting from the bottom of the coat and moving upward. This technique is especially important for breeds with curly or long fur, such as Poodles, Shih Tzus, or Cocker Spaniels.
For double-coated dogs, use an undercoat rake to remove loose undercoat hairs that trap moisture. You'll notice that as you brush, more damp fur is exposed, so continue blow-drying and brushing in tandem until the entire coat feels dry to the touch. Be gentle around sensitive areas like the belly and inner thighs. If you encounter a mat, never yank it—use your fingers to tease it apart or carefully cut it out with blunt-nosed scissors (or see a professional groomer).
Combining drying with brushing not only saves time but also distributes natural oils, giving the coat a healthy shine. It also allows you to check for any skin abnormalities, such as lumps, bumps, or redness, that you might have missed during the bath. Additionally, the rhythmic brushing motion can be calming for many dogs, turning the drying session into a bonding experience.
Step 4: Check Skin and Paws
Once the coat feels dry to your touch (not just warm from the dryer), it's time to inspect your dog's skin and paws. Moisture can hide in hard-to-reach spots, leading to problems like hot spots, interdigital cysts, or ear infections. Use a cotton ball to gently dry inside the ear flaps—never insert anything into the ear canal. If you notice any redness, discharge, or unusual odor, consult your veterinarian.
Next, examine the paw pads and between the toes. Excess moisture in these areas can cause yeast or bacterial overgrowth, especially in dogs with deep interdigital spaces. Carefully spread the toes and dab them dry with a soft cloth. For long-haired breeds, trimming the hair between the paw pads can help reduce moisture retention. After drying, you can apply a pet-safe paw balm if the pads seem dry or cracked.
Do a final check of the entire body: run your hands through the coat from head to tail. If any area feels damp, go back over it with the dryer or a fresh towel. Under the armpits, behind the ears, and the groin area are common trouble spots. Ensuring your dog is completely dry before they head outside or lie down on furniture is vital for their comfort and health.
Step 5: Reward and Final Checks
The last step in properly drying your dog after a bath is to make the experience end on a positive note. Offer plenty of praise and a high-value treat. This reinforces good behavior and helps your dog associate bath time and drying with rewards. Take a moment to brush your dog's coat once more, giving a final shining finish.
Check the environment: ensure there are no drafts, especially if your dog is short-haired or a small breed, as they can get chilled quickly. If it's cold outside, wait at least an hour before taking your dog for a walk—their coat needs time to fully air-dry and regulate body temperature. Finally, clean up your supplies and store them for next time. With consistent practice, the drying routine will become faster and less stressful for both you and your dog.
Conclusion
Mastering how to properly dry your dog after a bath is a skill that pays off in a healthier coat, happier pet, and fewer grooming emergencies. By following these five steps—thorough towel drying, careful blow-drying, brushing during the process, inspecting skin and paws, and rewarding your dog—you set the stage for a positive grooming relationship. Remember, every dog is different; some may need more patience with the dryer, while others may enjoy the warm air. Adjust your technique to suit your dog's comfort level, and always prioritize safety over speed. With the right tools and a calm approach, you'll turn bath day into a breeze for both of you.