
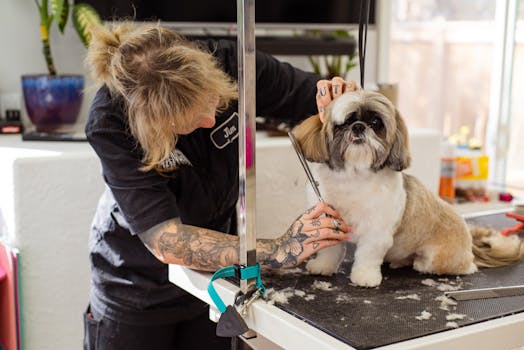
Are you tired of expensive grooming appointments and ready to take control of your pup’s coat? Learning DIY dog haircuts at home is not only cost-effective but also strengthens the bond between you and your furry friend. Whether you have a doodle that needs regular trims or a double-coated breed that just needs a tidy-up, mastering a few basic techniques can keep your dog looking and feeling great. With the right tools, a calm environment, and a step-by-step approach, you can achieve a salon-quality cut without leaving your house. This guide walks you through everything from gathering supplies to finishing touches, so you can groom confidently and safely.
1. Gather Your Essential Tools and Materials
Before you pick up any clippers, assemble everything you need. Having the right tools on hand prevents mid-grooming frustration and ensures a safer experience for your dog. Here is a checklist of must-have items for any home grooming session:
- High-quality dog clippers (corded for power, cordless for maneuverability)
- Clipper blades in multiple sizes (e.g., #10 for sanitary areas, #7 or #5 for body)
- Slicker brush and undercoat rake for detangling
- Curved and straight shears (blunt-tip for safety)
- Grooming comb with both fine and wide teeth
- Nail clippers or grinder and styptic powder
- Ear cleaner and cotton balls
- Grooming table or non-slip mat
- Treats and a clicker or verbal marker for positive reinforcement
Additionally, keep a towel handy for wiping away loose hair, and consider a grooming apron to collect fur. Investing in quality equipment may cost more upfront, but it pays off in durability and ease of use. For example, a clipper that operates quietly reduces stress for noise-sensitive dogs.
2. Prepare Your Dog and Your Workspace
Set the stage for a calm and successful grooming session. Choose a quiet, well-lit area in your home—ideally a bathroom or kitchen with easy cleanup. Place a non-slip mat on the floor or on a grooming table to give your dog secure footing. Exercise your dog beforehand so they are slightly tired and more cooperative.
Begin by thoroughly brushing your dog's coat to remove tangles and debris. This step is crucial because mats can pull skin painfully when clippers pass over them. Use a slicker brush in the direction of hair growth, then follow with a comb to check for remaining knots. If you encounter a mat, do not try to cut it out with clippers—use scissors carefully or work it apart with your fingers.
Between steps, reward your dog with treats and praise. Short training sessions every few days leading up to the groom help desensitize them to the sound of clippers and the feel of scissors. Patience is key; rushing can cause accidents or create a negative association with grooming.
3. Brush and Detangle Thoroughly
A properly brushed coat is the foundation of every good DIY haircut. Even if you brushed earlier, take another few minutes to go over the entire body with a slicker brush, paying special attention to areas prone to matting: behind the ears, under the legs, and around the collar. For double-coated breeds, an undercoat rake will remove loose fur from the dense undercoat, reducing shedding and preventing clipper burn.
After brushing, run a comb through the coat to confirm there are no tangles. If you find a small mat, apply a detangling spray and gently work it apart with your fingers or a dematting tool. Never yank or pull, as this can hurt your dog and make them resist future grooming. A well-brushed coat allows clippers to glide smoothly, which means a more even trim and less irritation.
4. Choose the Right Clipper Blade and Set the Length
Selecting the correct blade and guard comb is essential to achieving your desired length. Blade numbers indicate how close the cut will be—higher numbers leave more hair. For example, a #10 blade leaves about 1/16 inch (ideal for sanitary trims and paw pads), while a #5 blade leaves 1/4 inch (great for a short summer cut). Guard combs snap onto the blade and add length; a 1-inch guard comb maintains a longer, fluffier look.
Consider your dog's coat type. For curly or woolly coats (like Poodles or Bichons), you can use a longer guard comb to avoid cutting too short. For smooth coats, a narrow blade setting or a snap-on comb works well. Always test the blade temperature before use—run it against the back of your hand. If it feels hot, apply a few drops of clipper coolant or wait for it to cool down to avoid burning your dog's skin.
5. Start with the Body: Clipping Techniques
Begin clipping on the back, which is usually the least sensitive area. Hold the clipper flat against the skin and move in long, even strokes in the direction of hair growth. Overlap each stroke slightly to avoid leaving stripes. Avoid pressing down hard; let the clipper's weight do the work. Work from the neck toward the tail, then move down the sides and belly.
When you reach the belly, be extra gentle. The skin there is thinner and more sensitive. Use a #10 blade or a shorter guard comb, and stretch the skin taut with your free hand to prevent nicks. For the chest and throat area, switch to a smaller blade if needed to maneuver around bony prominences. Take frequent breaks to check your progress and to give your dog a chance to shake off loose hair.
6. Trim the Legs and Paws with Care
Legs require a bit more finesse because of their cylindrical shape and joints. Use a longer guard comb on the legs if you want to maintain fullness, and clip upward from the paw toward the body. For a neat appearance, blend the leg hair with the body hair by using a thinning shear or by angling the clipper slightly as you transition.
Paws are a delicate area. First, trim the hair between the paw pads using a #10 or #30 blade. Gently spread the toes apart and shave from the top of the pad toward the bottom, being careful not to cut into the webbing or the pad itself. For the top of the paw, you can round the hair with curved shears for a tidy "cat foot" look. Keep your dog's foot steady but do not squeeze too tightly—this can cause squirming.
7. Tackle the Face, Ears, and Tail with Scissors
When it comes to the face, switch from clippers to scissors. The face is highly sensitive and requires precision. Use blunt-tip curved shears to trim around the eyes, mouth, and muzzle. Always cut away from the eyes and avoid pointing scissors toward the dog's face. For the area above the eyes, comb the hair forward and snip just above the brow line.
Ears need careful attention, especially for drop-eared breeds. Using straight shears, trim the hair on the outer edge of the ear flap in a clean line. For the inner ear, pluck or gently clip excess hair with a #40 blade (if you have one) to improve air circulation. If your dog resists, stop and try again later. The tail can be trimmed to match the body length—many owners prefer a rounded or tapered look. Use curved shears to shape the tail, working from the base to the tip.
8. Finishing Touches and Post-Grooming Care
Once the haircut is complete, give your dog a thorough once-over. Brush the coat again to remove any loose hairs caught in the clipper lines. Check for any uneven spots and touch them up with scissors or a clipper on a low setting. Bathe your dog if desired, but note that some groomers prefer to bathe before clipping to avoid clogging blades. If you bathe after, use a gentle dog shampoo and condition to soothe any minor irritation.
Finish with a nail trim and ear cleaning. Trim nails just before the quick (the pink part) to avoid bleeding, and use a file or grinder to smooth edges. Clean the ears with a vet-approved solution and cotton balls—never use Q-tips deep inside the ear canal. Finally, reward your dog with their favorite treat and plenty of praise. Store your tools properly: clean blades with a brush and oil them lightly to prevent rust.
Conclusion
Mastering DIY dog haircuts at home is a rewarding skill that saves money and strengthens your relationship with your pet. By following this step-by-step guide—preparing your workspace, choosing the right tools, brushing thoroughly, and using safe clipping and scissoring techniques—you can produce professional-looking results. Remember that practice makes perfect; your first few cuts may not be flawless, but your dog will appreciate your calm, patient approach. Always prioritize safety, stop if your dog becomes stressed, and consult a professional groomer or veterinarian if you have concerns about matting or skin issues. With these techniques, you are well on your way to becoming your dog’s favorite groomer.