
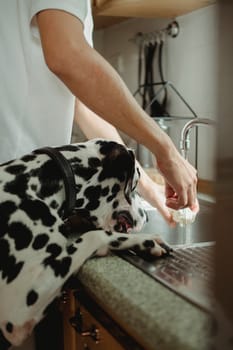
Your dog or cat may come home with a small scrape, cut, or scratch after exploring the backyard or roughhousing with a friend. Knowing how to clean and treat minor pet wounds at home is a valuable skill that can prevent infection and speed up healing. However, it is equally important to recognize when a wound requires professional veterinary attention. In this step-by-step guide, you will learn the safe, effective method for managing minor injuries, the supplies you need, and the signs that indicate it is time to call your vet.
Essential Materials and Tools for Pet Wound Care
Having the right supplies on hand makes home wound care safer and less stressful for both you and your pet. Gather these items before you begin:
- Clean towels or gauze pads (sterile preferred)
- Pet-safe antiseptic solution (chlorhexidine or diluted povidone-iodine)
- Sterile saline solution or clean water
- Blunt-tipped scissors (to trim fur around the wound)
- Disposable gloves
- Tweezers (for removing debris, if necessary)
- Non-stick bandage pads and self-adhesive wrap (Vetwrap)
- Elastic bandage or medical tape (optional)
- Elizabethan collar (e-collar) to prevent licking
- Treats to reward calm behavior
Additionally, never use hydrogen peroxide, rubbing alcohol, or human antiseptics containing alcohol on a pet’s wound—these can damage tissue and delay healing. Stick to veterinarian-recommended products.
Step 1: Assess the Wound and Ensure Safety
Before touching the injury, take a moment to evaluate its severity. Minor wounds include shallow cuts, abrasions, or small punctures that do not bleed heavily and are not located near the eyes, mouth, or genitals. If the wound is deep, gushing blood, larger than half an inch, or caused by a bite from another animal, stop and contact your veterinarian immediately. Furthermore, if your pet is in obvious pain, growling, or snapping, do not attempt treatment at home—seek professional help instead.
Signs Your Pet Needs Veterinary Care
- Bleeding that does not stop after 10 minutes of pressure
- Wound involving an eye, ear, or joint
- Embedded foreign object (glass, stick, or fishhook)
- Signs of infection: redness, swelling, pus, or foul odor
- Lethargy, fever, or loss of appetite
First, put on disposable gloves to protect both you and your pet from potential bacteria. Next, calmly speak to your pet and offer treats to reduce anxiety. If the wound is on a leg or paw, you may need a second person to gently restrain the animal.
Step 2: Clean the Wound Thoroughly
Cleaning is the most crucial step in preventing infection. Begin by using sterile saline solution or clean running water to flush away dirt, debris, and bacteria. You can pour the saline directly from a bottle or use a syringe (without needle) for a gentle stream. Do not scrub the wound—irrigation is much gentler and more effective.
If the area has thick fur, carefully trim the hair around the wound using blunt-tipped scissors. This prevents hair from sticking to the healing tissue and allows you to see the full extent of the injury. However, be extremely cautious not to cut the skin or pull on the wound edges. After trimming, flush again with saline to remove loose hair.
Once the wound looks clean, apply a small amount of pet-safe antiseptic—chlorhexidine solution (diluted to 0.05%) or povidone-iodine (diluted to a weak tea color) are excellent choices. Use a gauze pad soaked in the solution to gently dab the wound and the surrounding skin. Avoid pouring the antiseptic directly into deep puncture wounds, as this can irritate internal tissues.
Step 3: Remove Debris and Control Bleeding
For minor wounds that have picked up gravel, grass, or dirt, you may need to remove visible debris with clean tweezers. First, sterilize the tweezers with rubbing alcohol (let it dry completely) or boil them for 5 minutes. Gently grasp any visible particles and lift them out. Do not dig into the wound—if debris is deeply embedded, leave it for your veterinarian.
If the wound is still oozing blood after cleaning, apply gentle pressure with a clean gauze pad for 5 to 10 minutes. Most minor bleeding will stop on its own. For small scrapes, a little bleeding can actually help flush out bacteria, but prolonged bleeding indicates a deeper problem.
Additionally, never use a tourniquet at home, and avoid applying topical antibiotic creams unless specifically approved by your vet—many contain ingredients that can be toxic if ingested by pets.
Step 4: Apply a Dressing and Bandage (When Needed)
Not every minor wound needs a bandage. In fact, many small cuts heal faster when left open to air, as long as the pet does not lick or bite the area. However, bandaging is helpful for wounds on paws, legs, or areas that the pet can easily reach. It also protects against dirt during the first 24 hours.
To bandage properly:
- Place a non-stick pad directly over the wound. Avoid cotton balls, as fibers can stick to the healing tissue.
- Wrap the area loosely with self-adhesive bandage (Vetwrap) to hold the pad in place. Ensure it is snug but not tight—you should be able to slide one finger under the wrap.
- If the wound is on a limb, include the paw and extend a few inches above the injury to prevent the bandage from slipping.
- Change the bandage daily, or sooner if it becomes wet or soiled. Each time, re-evaluate the wound for signs of infection.
Always monitor your pet’s behavior. If they try to remove the bandage, an e-collar is essential. Licking and chewing can introduce bacteria and delay healing significantly.
Step 5: Monitor Healing and Know When to Follow Up
After initial treatment, keep a close eye on the wound over the next several days. A healing minor wound should gradually become less red, with new pink skin forming at the edges. Mild swelling and a small amount of clear fluid are normal, but watch for these warning signs:
- Increasing redness, swelling, or heat around the wound
- Thick, yellow, or green discharge (pus)
- Foul odor
- Your pet appears painful, lethargic, or loses interest in food
- The wound is not closing within 3–5 days
If any of these occur, schedule a veterinary visit promptly. Moreover, certain wounds—even minor ones—may need antibiotics or a professional cleaning. Additionally, ensure your pet’s tetanus vaccination is up to date; although tetanus is rare in dogs and cats, it can occur, especially from deep puncture wounds contaminated with soil.
Finally, keep the area dry and clean during the healing process. Avoid bathing your pet or letting them swim until the wound is fully closed. Provide a clean, quiet resting area to reduce irritation.
Conclusion
Learning how to clean and treat minor pet wounds at home gives you confidence as a pet parent and helps your furry friend recover quickly. By following these steps—assessing the injury, gathering the right supplies, cleaning gently, and monitoring progress—you can manage small cuts and scrapes effectively. Remember that your veterinarian is always your best resource; when in doubt, seek professional advice. With patience, proper technique, and lots of TLC, most minor wounds will heal without complication. Keep a pet first aid kit stocked and ready, and you will be prepared for whatever adventure comes next.